Accounts are the customers you book rides for. An account is always a person; when that person books on behalf of a company, you type the company name once and Pickup Dispatch creates the company and links it to the account. You need at least one account before you create a reservation for a customer, so this is the first thing to set up in a new workspace.
 Video tutorial (2 min)
Before you start
- Only First Name and Last Name are required. Everything else can be completed later from Edit.
- You do not need rates yet. The Payments and Rates section can stay empty until your rate matrices are configured.
- The account number is assigned automatically when you save.
Steps
1
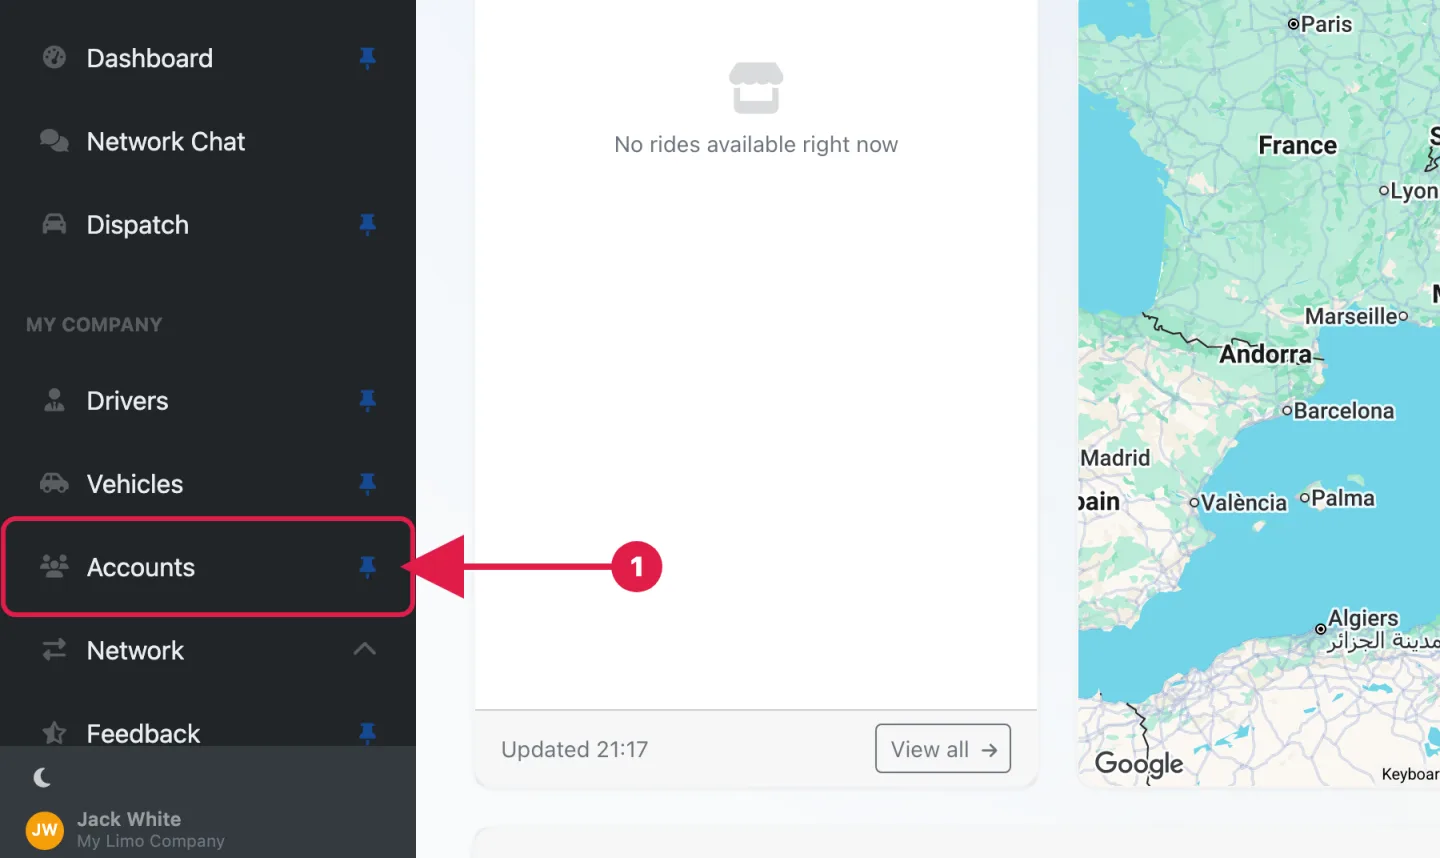
In the sidebar, under My Company, click Accounts.
2
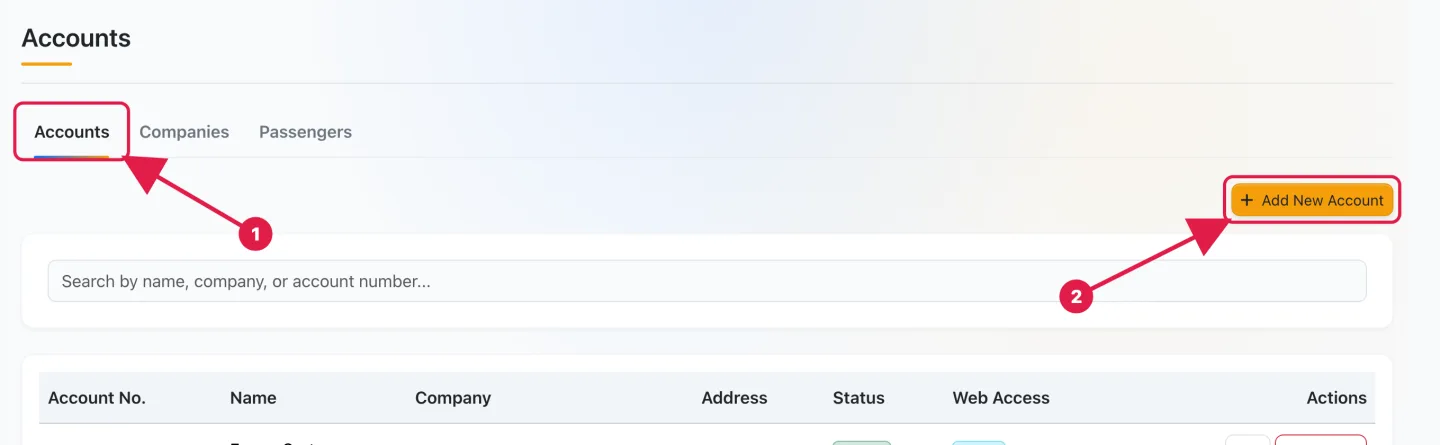
Stay on the Accounts tab and click Add New Account in the top-right corner.
3
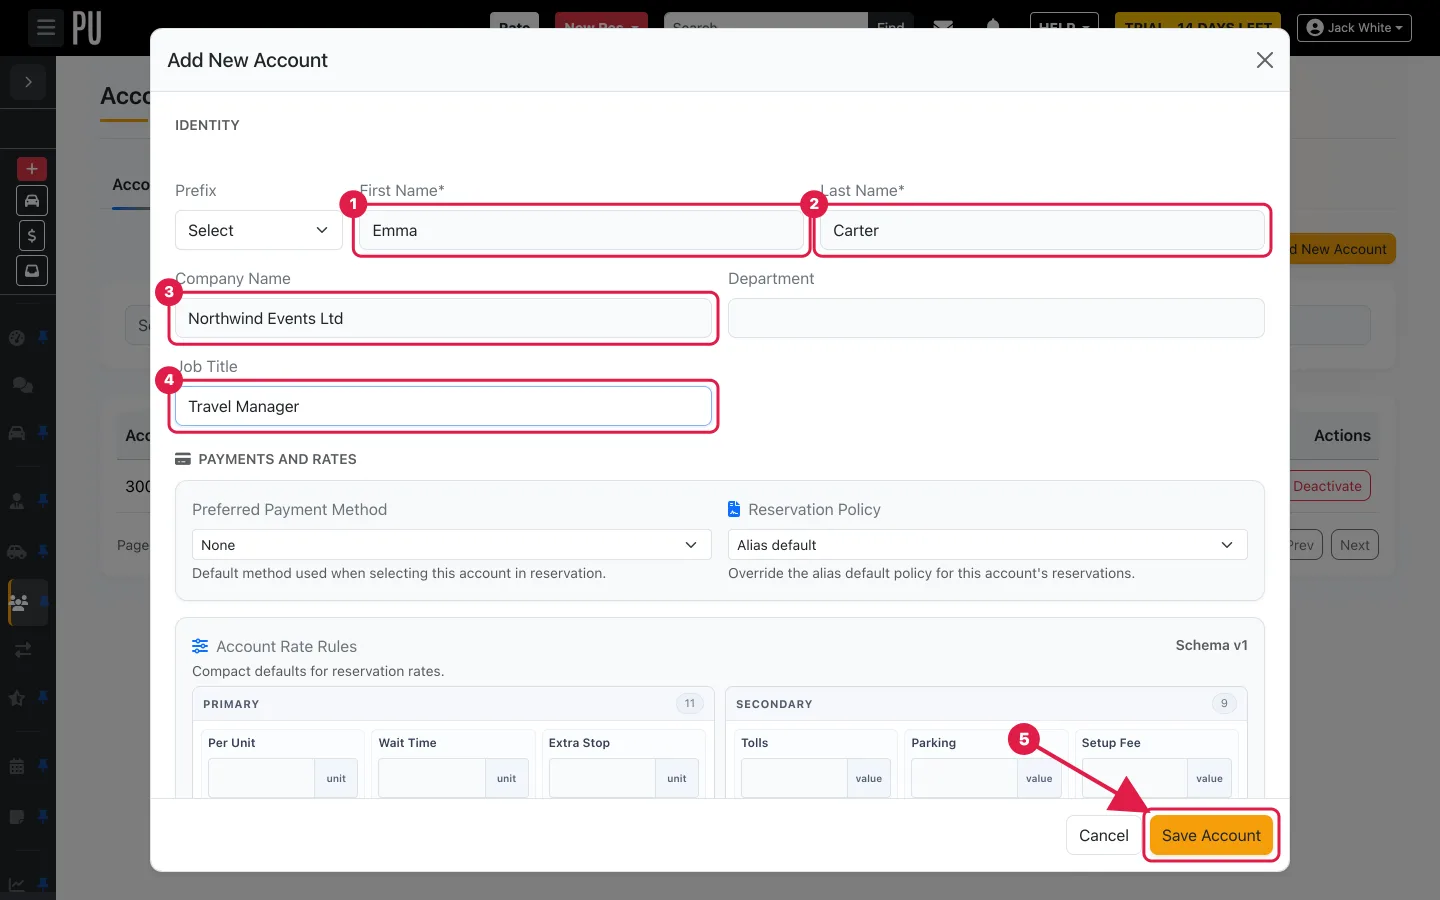
In the Identity section, enter the First Name and Last Name of your contact.
4
For a corporate account, type the Company Name. Pickup Dispatch looks the company up by name: if it does not exist yet it is created for you, if it already exists the account is linked to it. Leave the field empty for an individual customer. Department and Job Title are optional.
5
Leave Payments and Rates unchanged and click Save Account.
What happens when you save
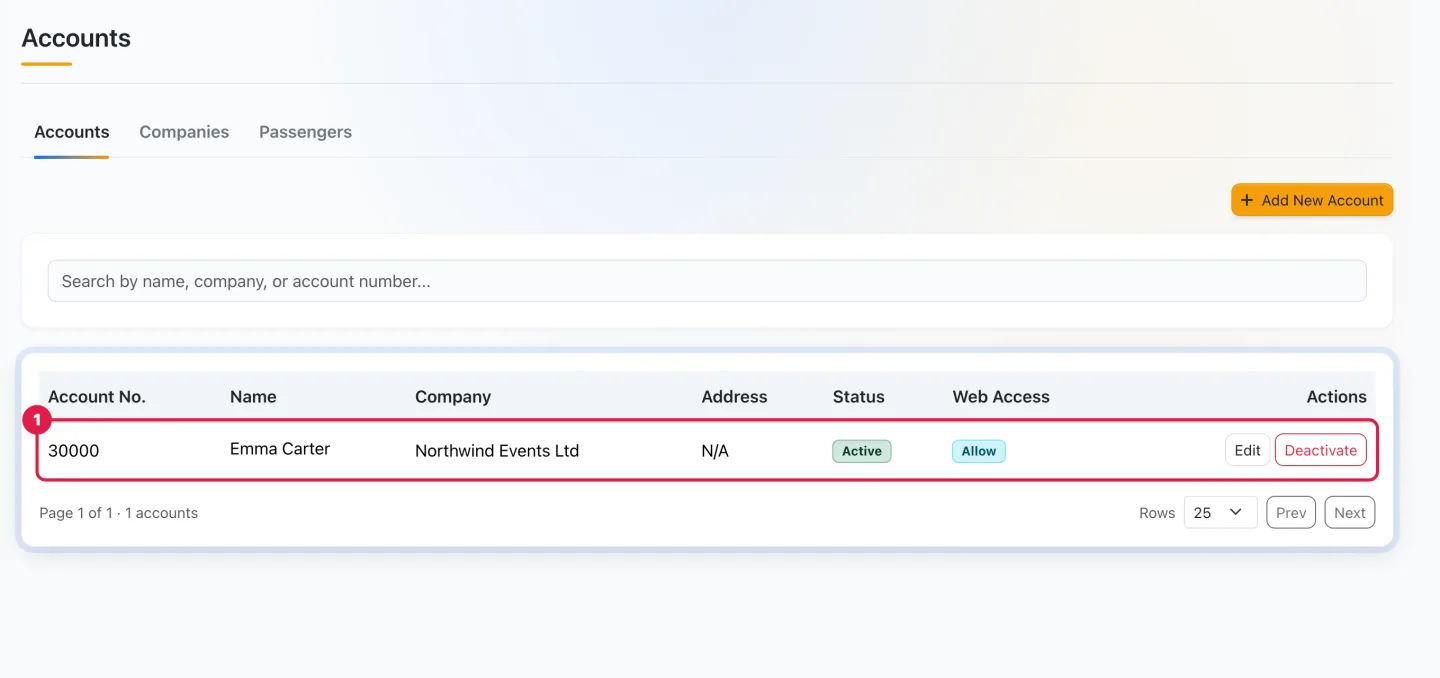
The account appears in the Accounts list with its account number, the company (if any), status Active and web access Allow.
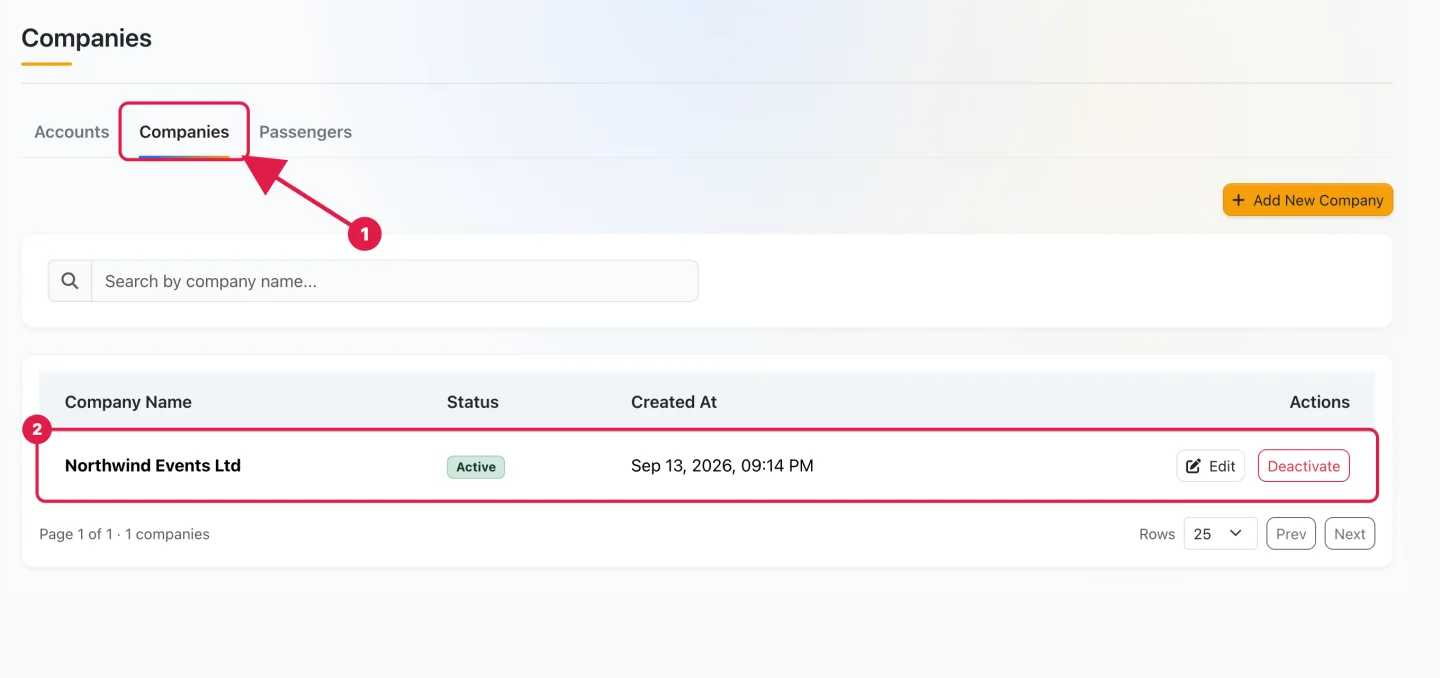
If you typed a company name, open the Companies tab: the company is listed there, created automatically and linked to the account. You can complete its details later from Edit.
The whole flow in 15 seconds
Good to know
- Further down the form you can also set the Account Type (Billing Contact, Passenger, Booking Contact), Priority, Status, Web Access, contact details and address. None of them is required to save.
- Typing the same company name on a second account links it to the same company: no duplicates are created.
- Preferred payment method, reservation policy and account rate rules belong to the Rates & Pricing setup and can be added to the account at any time.
Accounts are never deleted. Deactivate in the Actions column sets the account to inactive and removes its web access; its history stays intact and it can be reactivated later.
Next steps
- How to create a reservation for this account.
- How to add a vehicle and How to invite your first driver.
Need help? Open a free support ticket from HELP → Open a ticket in your workspace (unlimited) and follow the answers in HELP → My tickets. For a guided walkthrough you can also book a paid one-to-one Live training session from HELP → Book a live training session.