The Fleet is the list of the real cars you operate. Every vehicle belongs to a vehicle type (Standard, Executive, Minibus and so on), which is what rates and reservations refer to; the vehicle itself carries the plate, make and model, capacity and documents. Vehicle types come preconfigured, so adding a car is a single form.
 Video tutorial (2 min)
Before you start
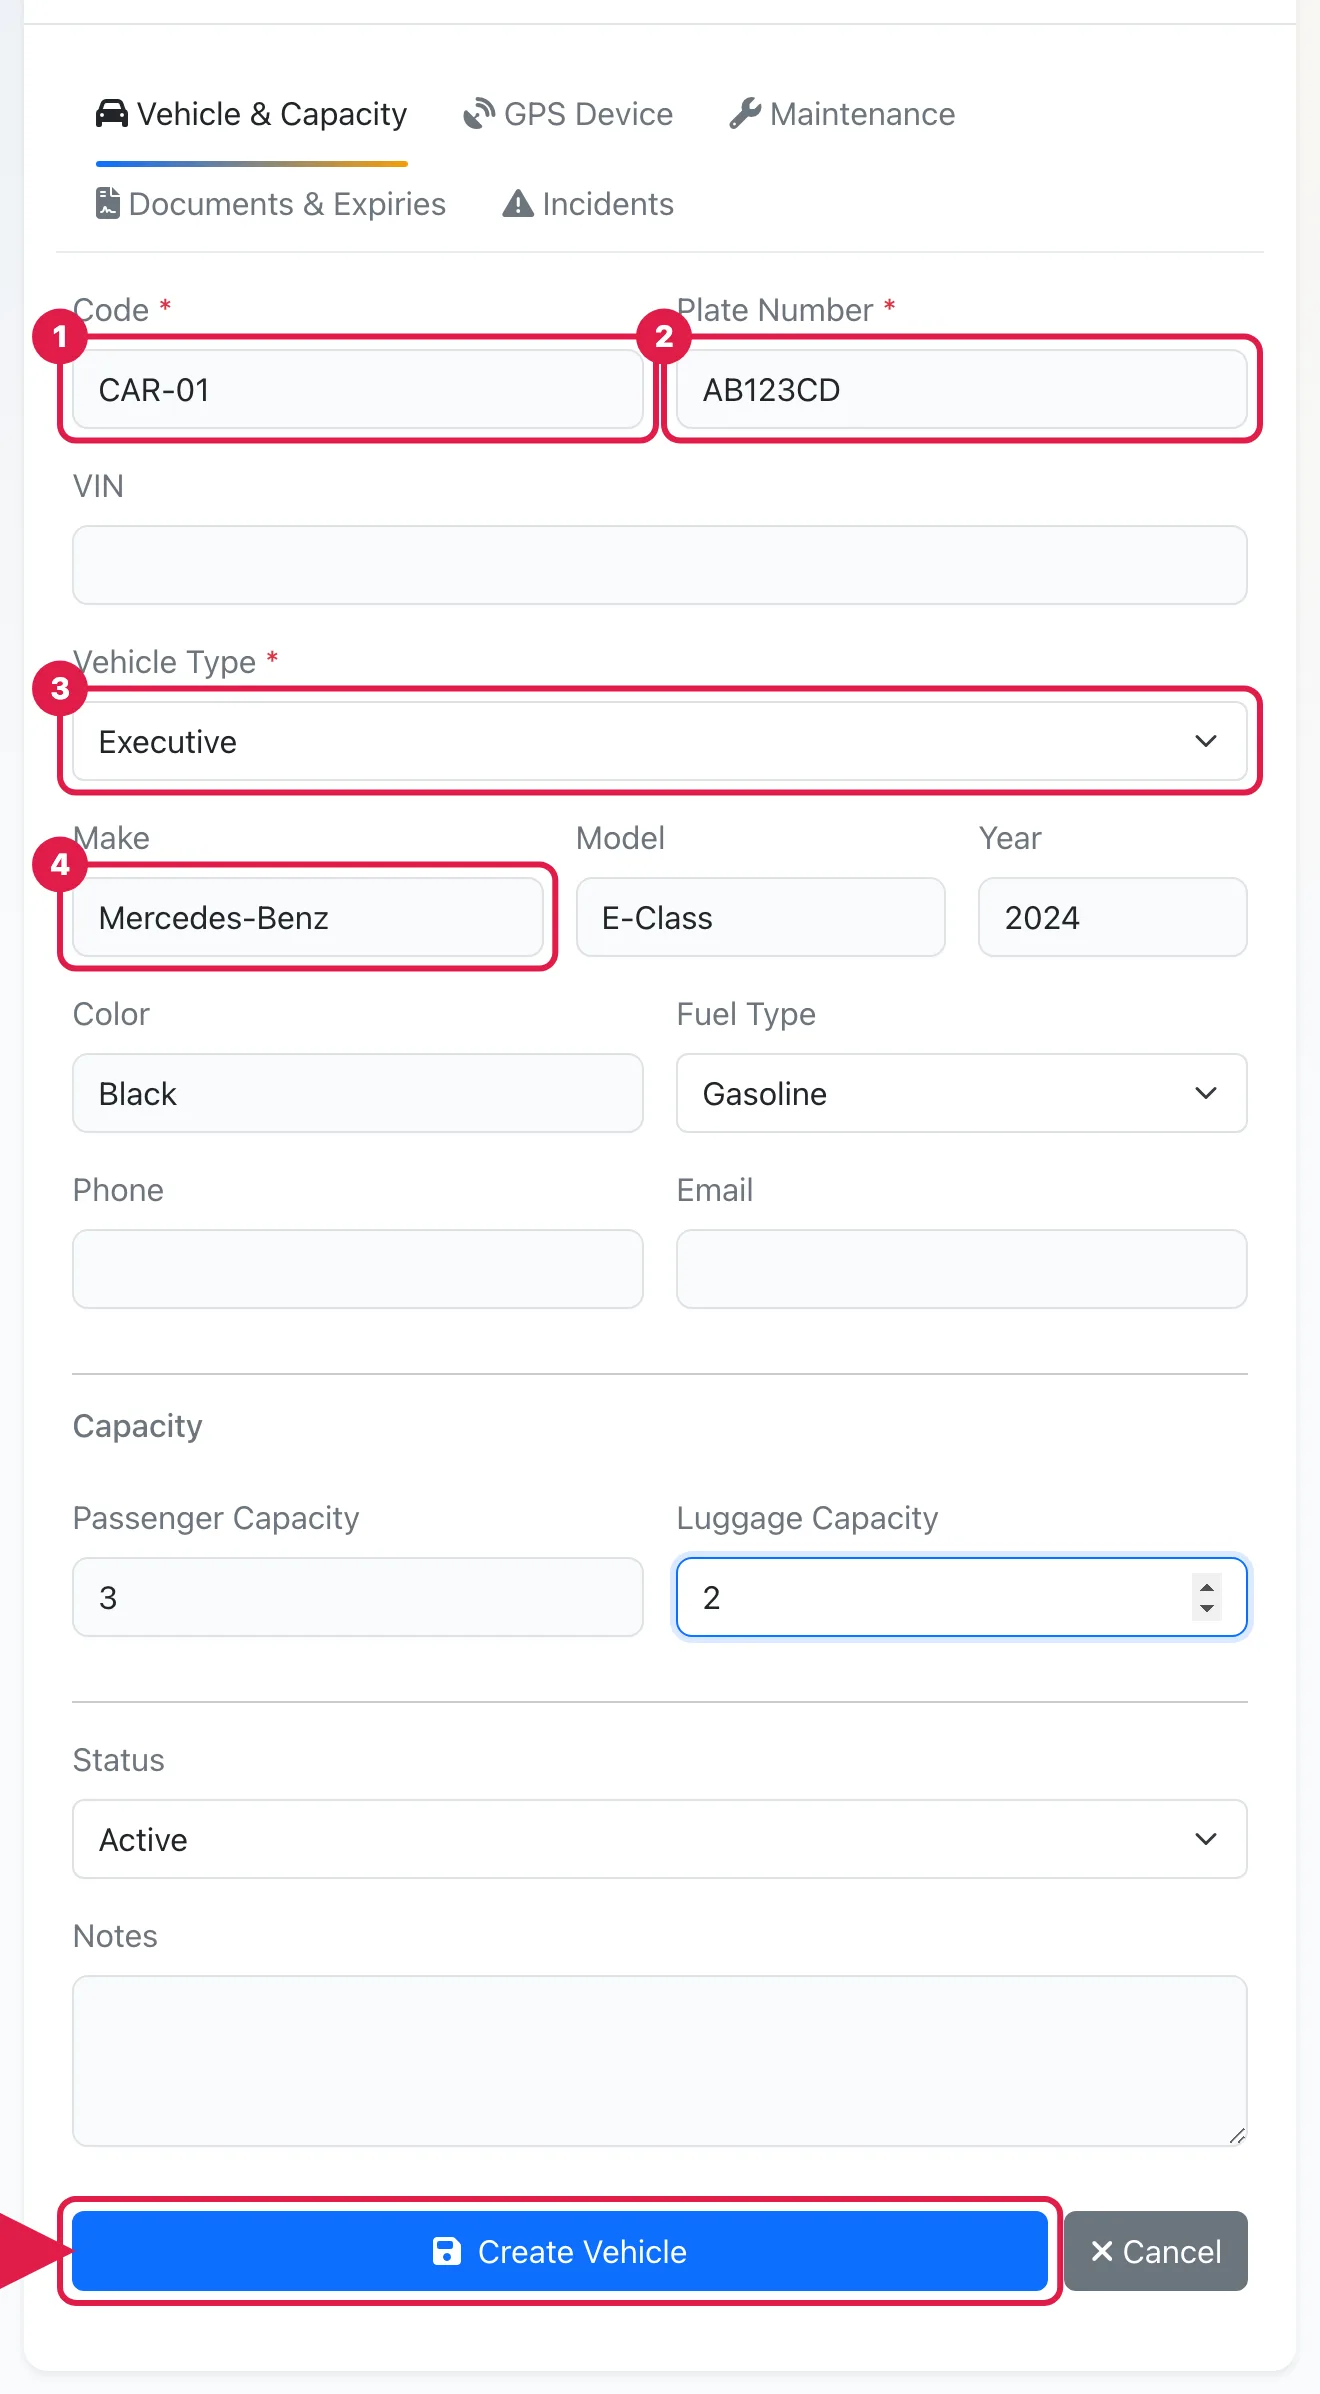
- Only Code, Plate Number and Vehicle Type are required. The code is your internal identifier (for example CAR-01); code and plate must be unique in your workspace.
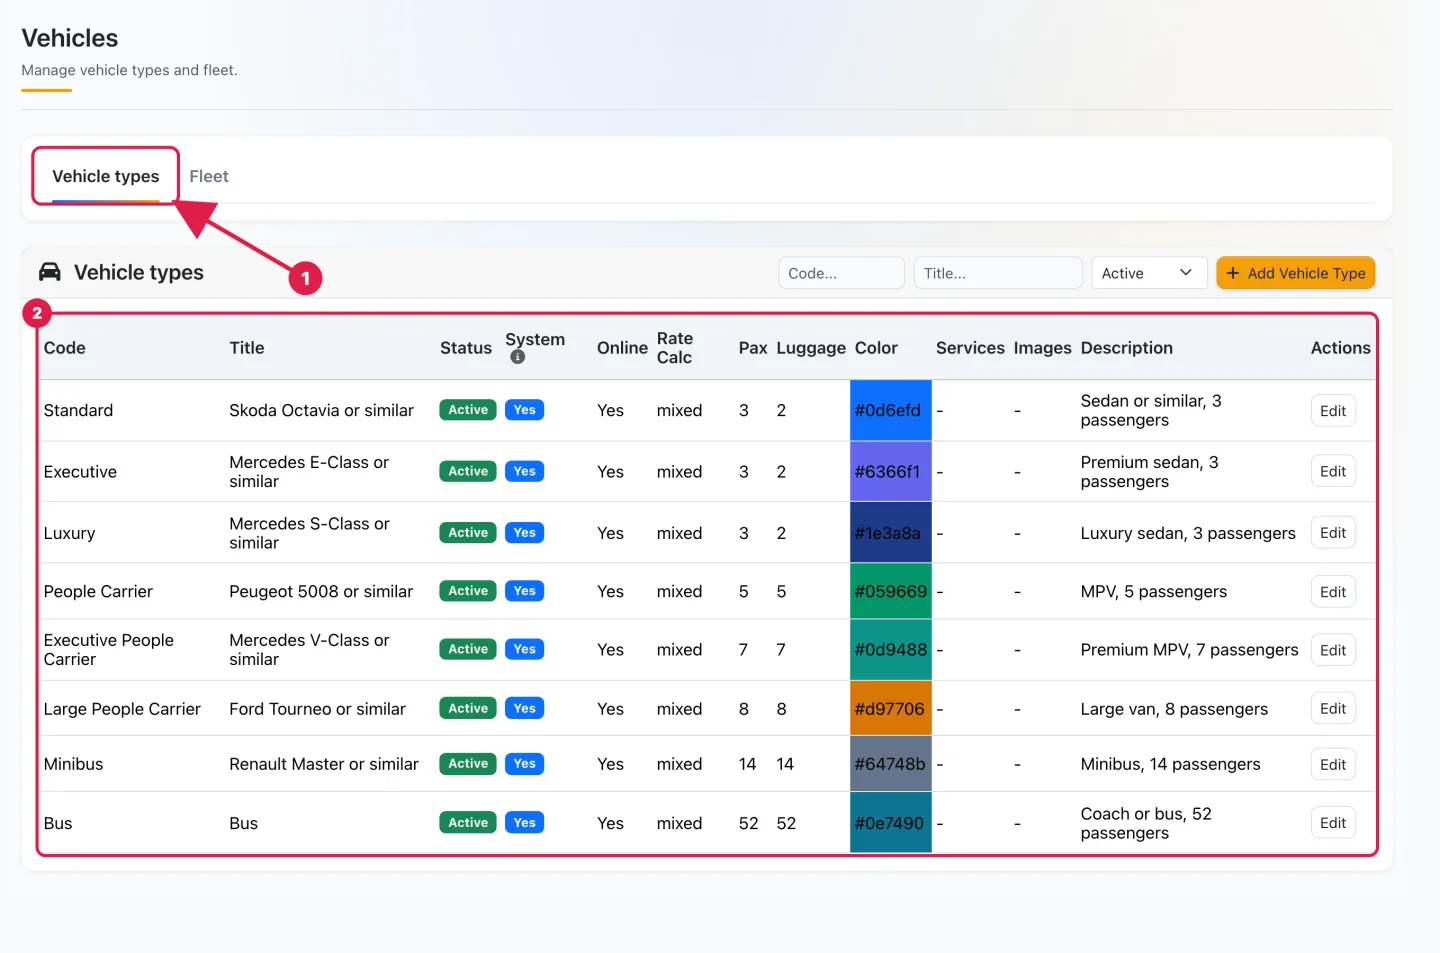
- Vehicle types are already there: your workspace comes with eight system types (Standard, Executive, Luxury, People Carrier, Executive People Carrier, Large People Carrier, Minibus, Bus). You can review them in the Vehicle types tab and add your own with Add Vehicle Type, but you do not need to.
- The number of vehicles you can register depends on your plan (Plans & Addons → Plans).
Steps
1
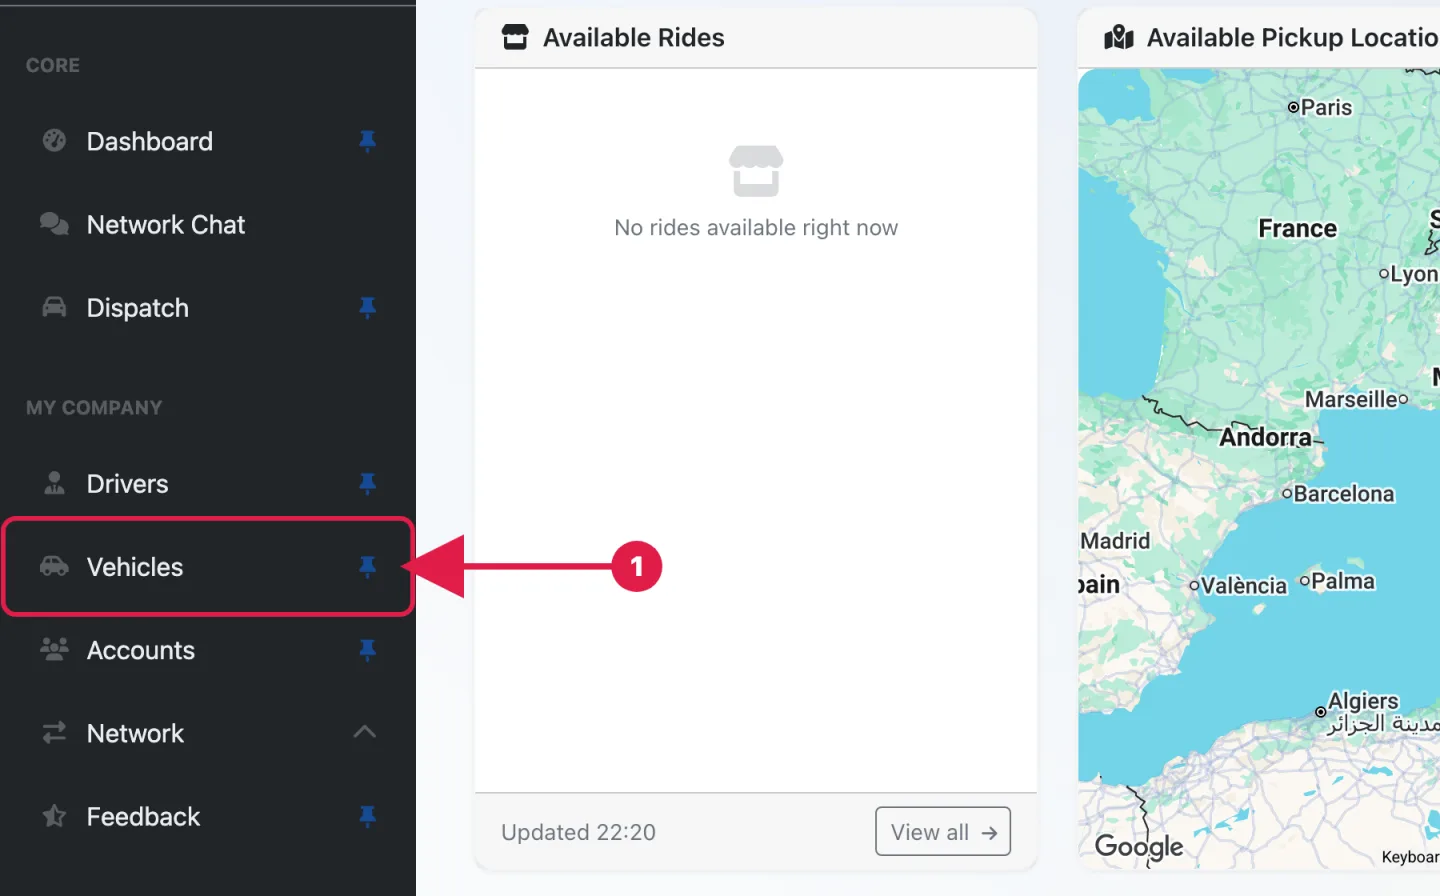
In the sidebar, under My Company, click Vehicles.
2
The Vehicle types tab opens first: this is where the preset types live. Nothing to do here for now.
3
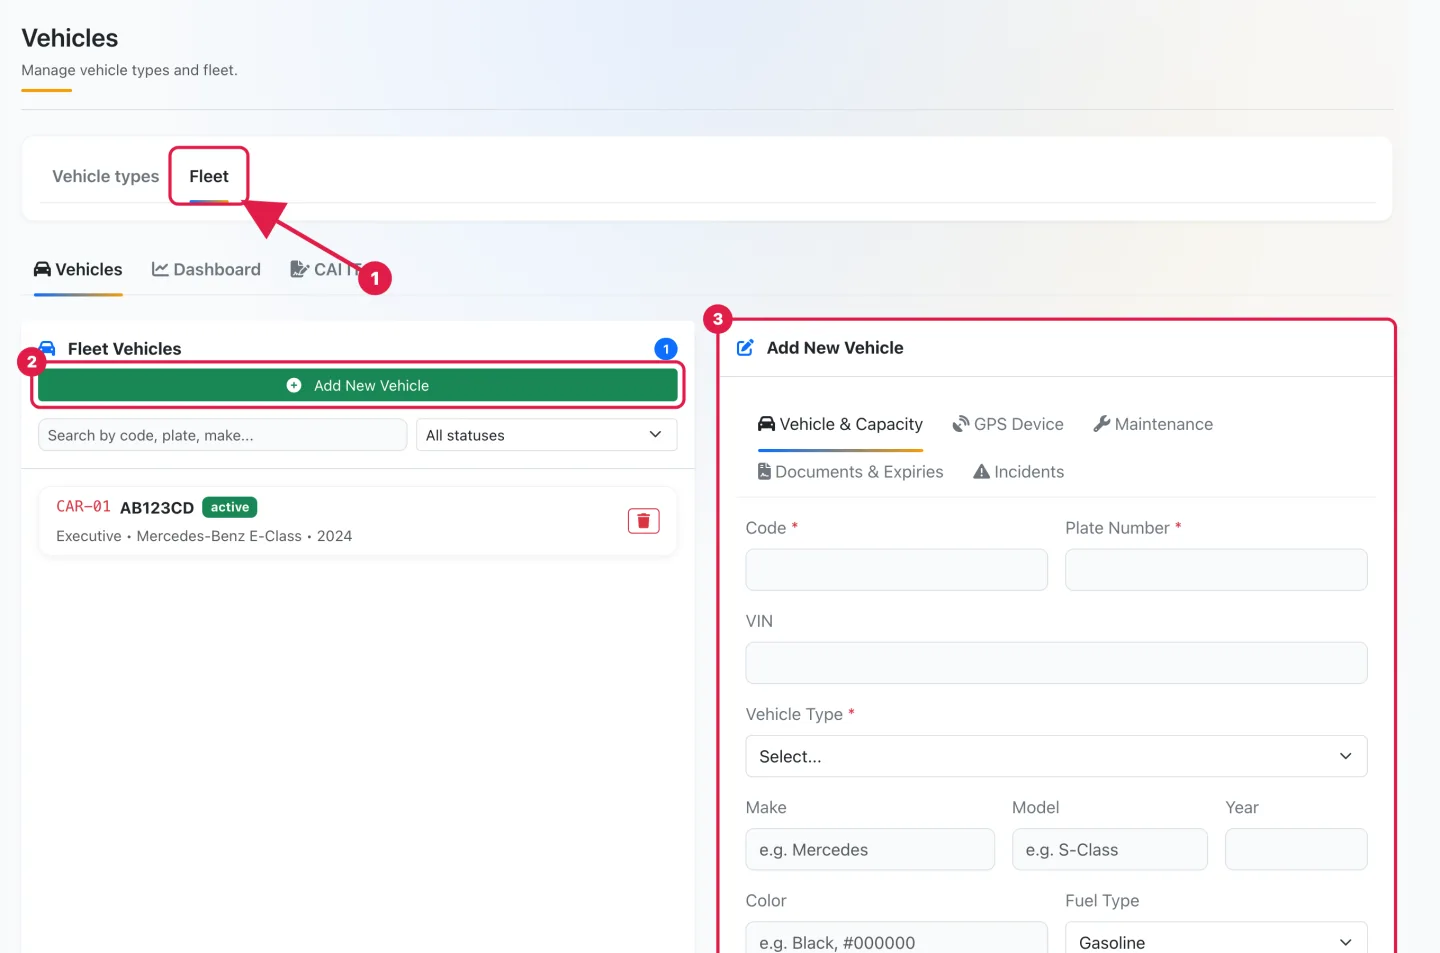
Open the Fleet tab. The Fleet Vehicles list is on the left and the Add New Vehicle panel on the right. Click Add New Vehicle.
4
In Vehicle & Capacity, enter the Code and the Plate Number, then choose the Vehicle Type.
5
Optionally add Make, Model, Year, Color, Fuel Type, Passenger Capacity and Luggage Capacity. Leave Status on Active.
6
Click Create Vehicle.
What happens when you save
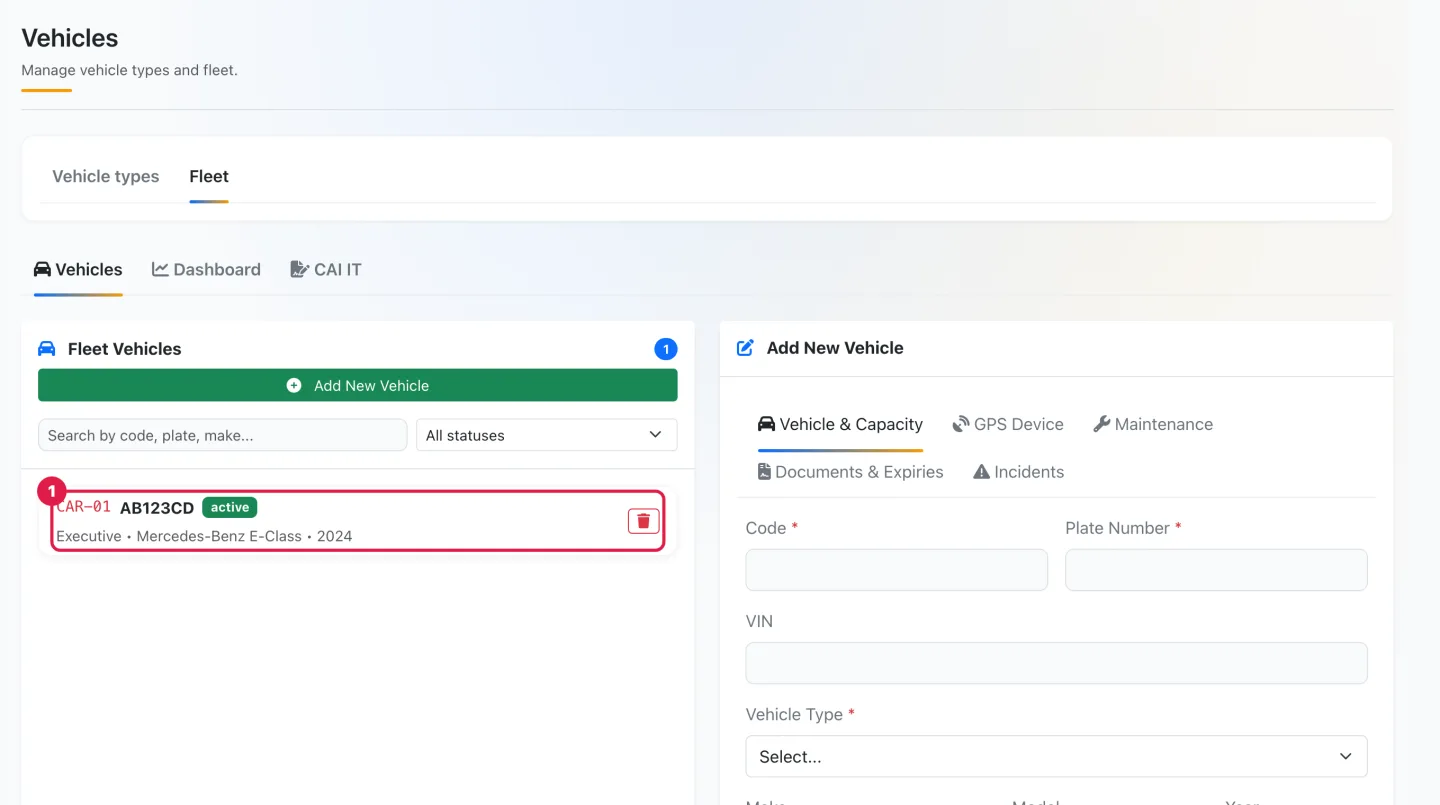
A confirmation appears (Vehicle created successfully) and the car is listed in Fleet Vehicles with its code, plate, status active, vehicle type, make, model and year. It is now available for reservations.
The whole flow in 15 seconds
Good to know
- The panel has four more tabs you can fill in later, once the vehicle exists: GPS Device, Maintenance, Documents & Expiries (insurance, inspection, authorizations, road tax and more) and Incidents.
- Status can be Active, Inactive, Maintenance or Decommissioned; the All statuses filter above the list lets you see any of them. Vehicles in Maintenance or Decommissioned stay in your history.
- Next to Vehicles, the Fleet tab also has a Dashboard and a CAI IT section (accident report forms).
A vehicle assigned to reservations cannot be deleted. The bin icon in the list works only for vehicles without reservations. For a car you no longer operate, change its Status to Decommissioned instead, so the history of its rides stays intact.
Next steps
- How to invite your first driver, who will drive this vehicle.
- How to create a reservation and Rates & Pricing for the vehicle types you use.
Need help? Open a free support ticket from HELP → Open a ticket in your workspace (unlimited) and follow the answers in HELP → My tickets. For a guided walkthrough you can also book a paid one-to-one Live training session from HELP → Book a live training session.