Before you enter a single price, tell the Rate Engine where you work. Two tools do that, both in Rates: a city is a point picked from Google Maps with a coverage radius around it; a zone is an area you draw yourself on the map. Fixed rates are then defined between pairs of cities or zones, and a reservation matches a city when its address falls within the radius, and a zone when it falls inside the drawing.
 Video tutorial (3 min)
City or zone?
- Use a city for "to or from a place" pricing (Los Angeles, Santa Monica): one search, one radius, done.
- Use a zone when the perimeter matters: an airport, a district, a resort area. Draw a Circle for round areas, a Polygon for irregular shapes (click the corners), or a Point for a single address such as a hotel.
Add a city
1
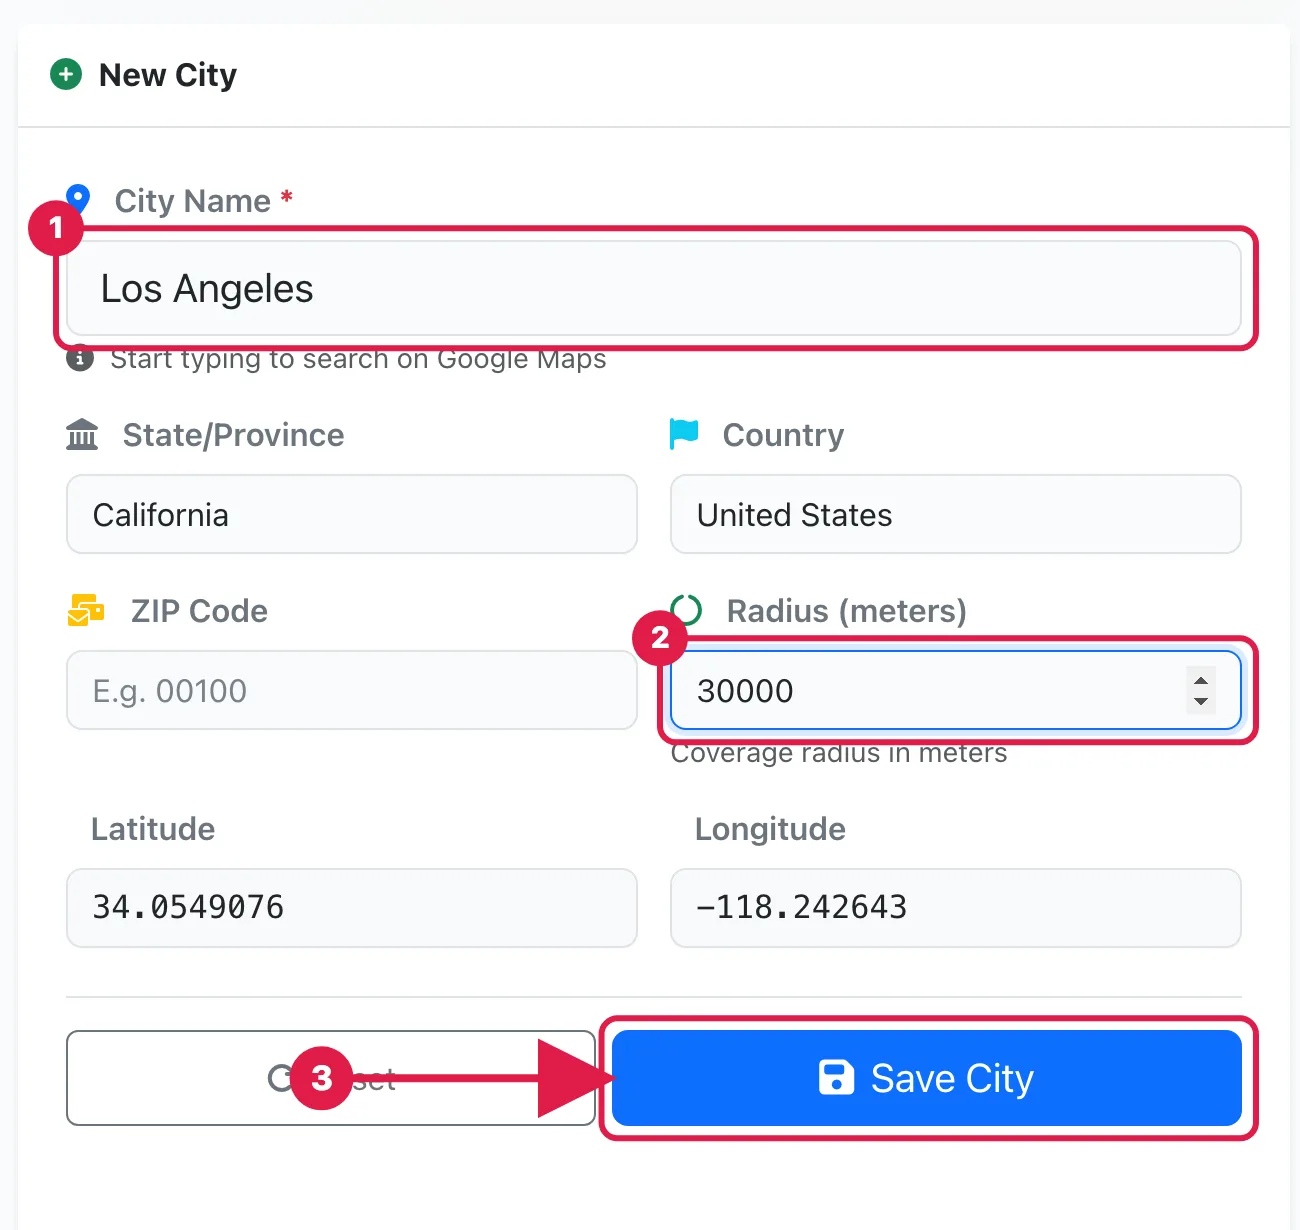
In the sidebar, under System Setting, click Rates, then open the Cities tab and click Add New City.
2
In City Name, start typing and pick the city from the Google Maps suggestions: State/Province, Country and coordinates are filled in for you.
3
Enter the Radius (meters), the distance from the center within which an address counts as that city, then click Save City. The city appears in Registered Cities and on the map.
Draw a zone
1
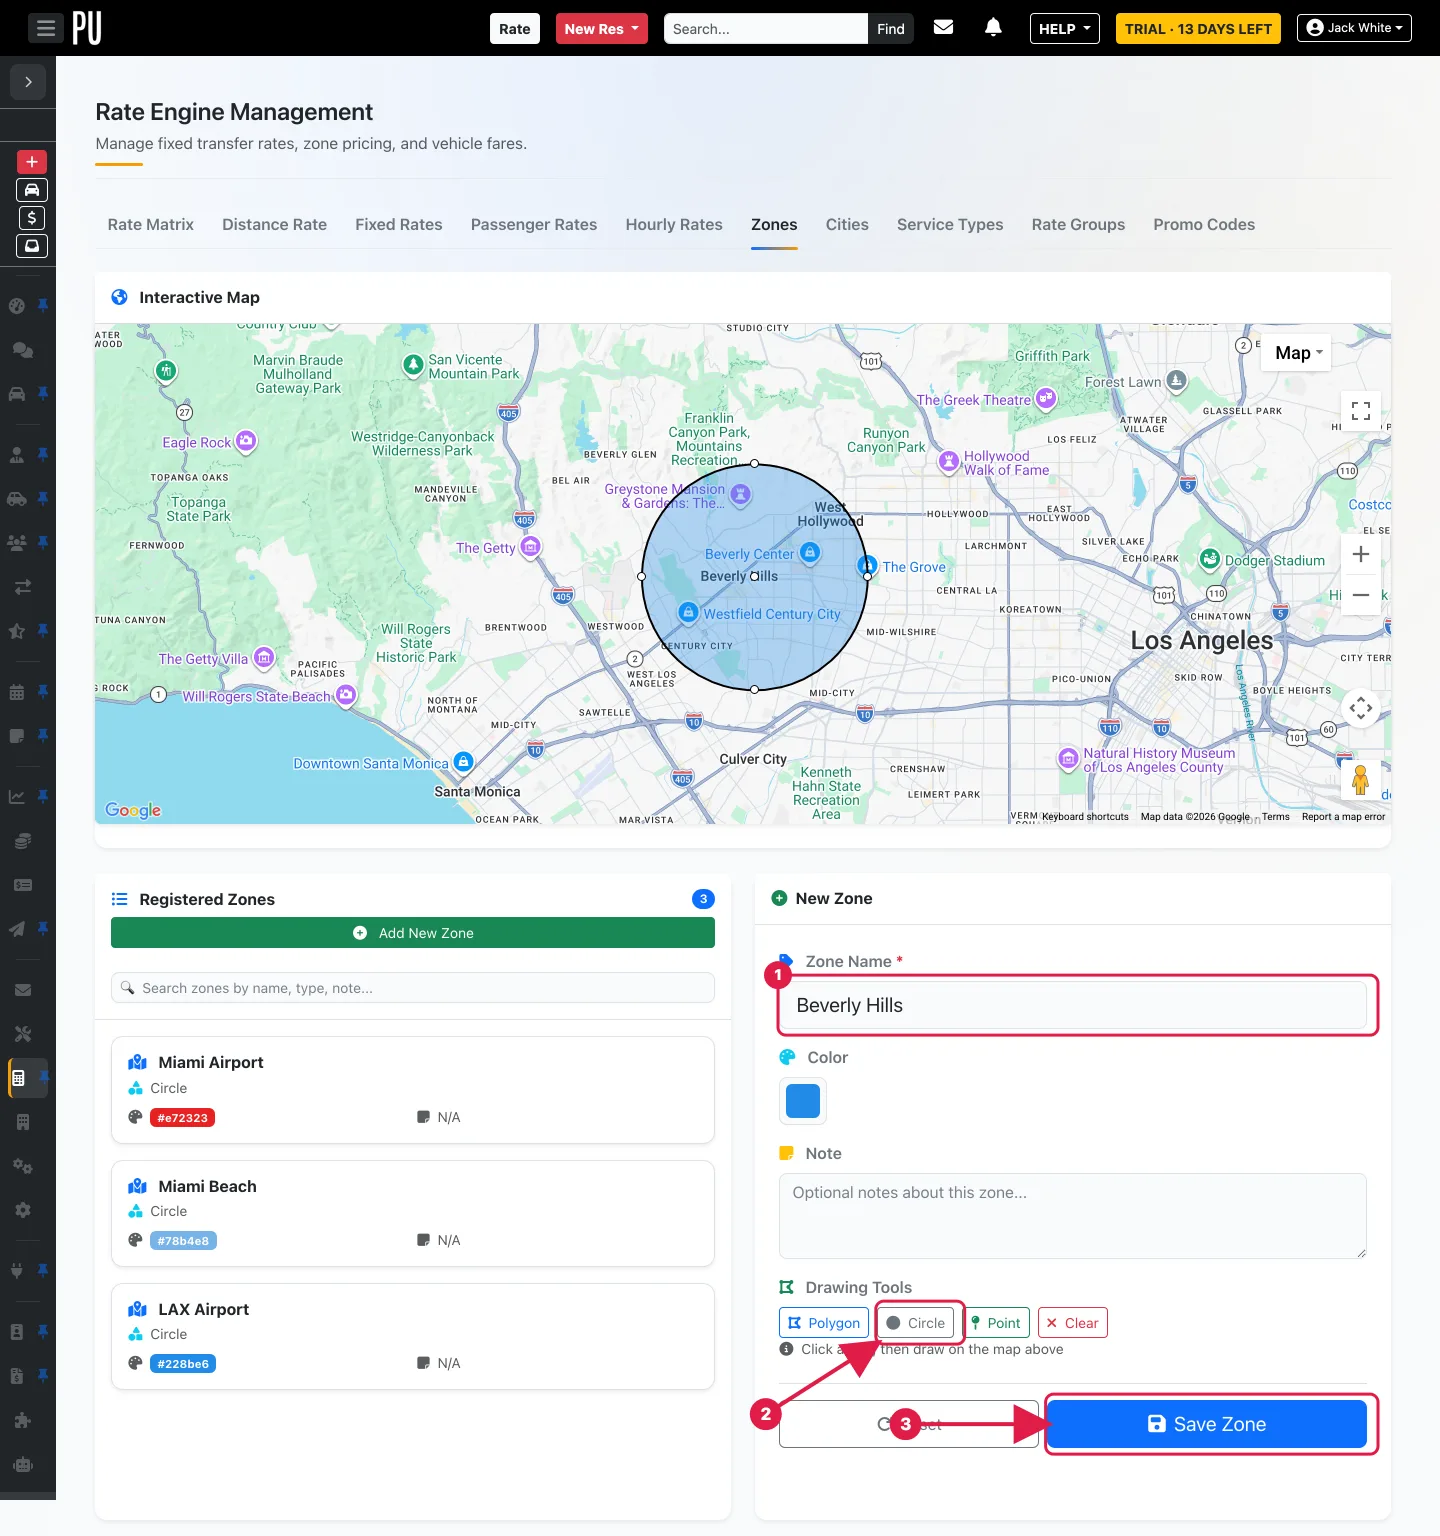
Open the Zones tab and click Add New Zone. Enter the Zone Name and choose a Color so you can tell zones apart on the map.
2
Move the map to the area, then in Drawing Tools click Circle: press on the center of the area and drag outwards to size the circle. You can still drag its edge to adjust it before saving.
3
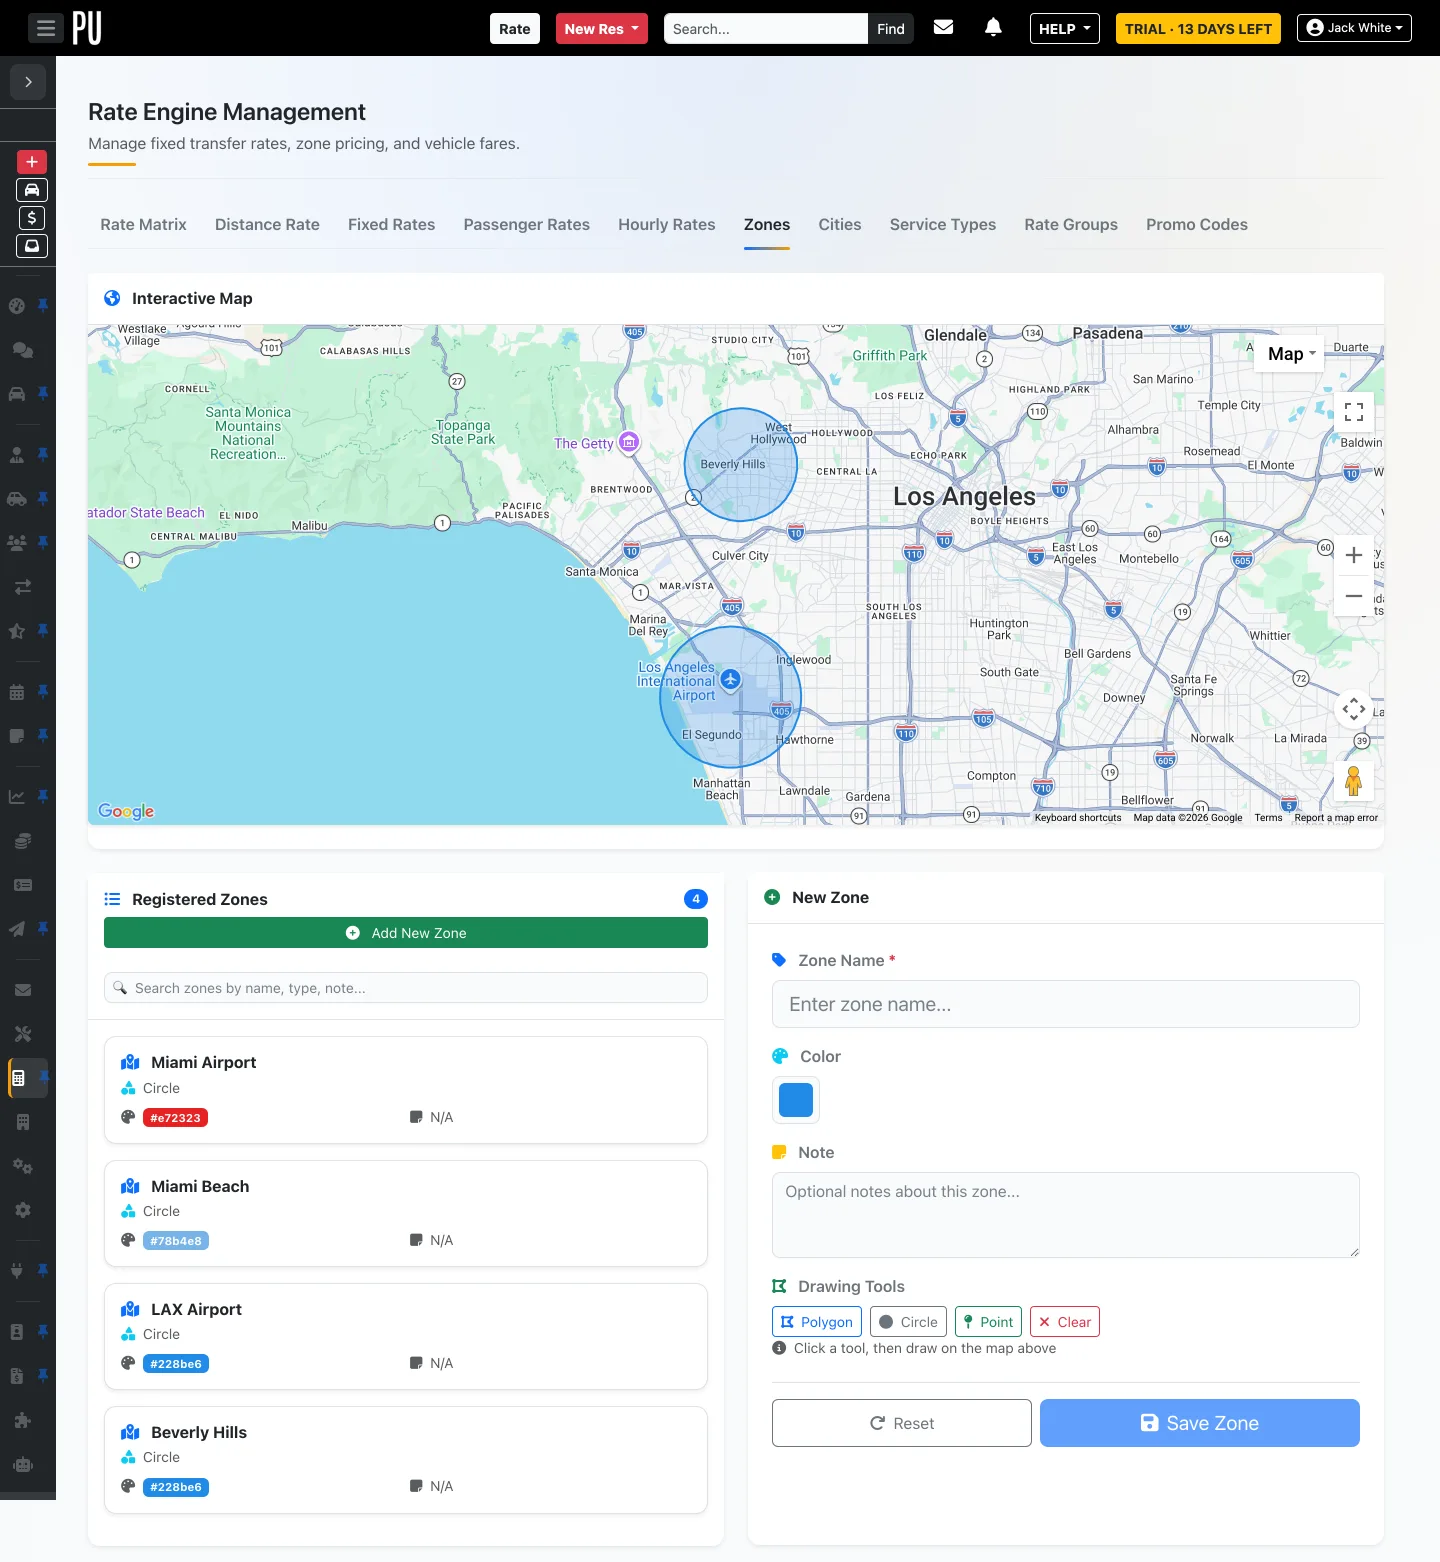
Click Save Zone. The zone appears in Registered Zones and stays drawn on the map. Repeat for every area you price separately, for example the airport and the districts you serve.
Good to know
- Clear removes the shape you are drawing so you can start again; Reset empties the form. Saved cities and zones can be edited later from their list.
- A city with a radius of zero covers nothing: always set a radius. Choose it from how far around the center you still consider "that city" for pricing.
- Zones can overlap. Keep names clear (an airport, a neighborhood, a venue) because they will be the labels you pick when you build fixed rates.
Next steps
- Understanding the Rate Engine if you have not read it yet.
- Set up fixed rates between the cities and zones you just created (next guide in Rates & Pricing).
Need help? Open a free support ticket from HELP → Open a ticket in your workspace (unlimited) and follow the answers in HELP → My tickets. For a guided setup of your coverage and rates you can also book a paid one-to-one Live training session from HELP → Book a live training session.